



5.13.2011

Guest Blogger #5: Jayna Rae @ RockNRegalia

Quick note: Blogger's being a jerk! It's been down for what seems like FOREVER, and has eaten two of my posts! But the show must go on, so here's my LAST blogger concluding Blog Swap Week!

 Please welcome, Jayna Rae!!!!

........................................................................................................................

I am excited to be doing my first OFFICIAL blog swap.
Woot! Woot!


I am so grateful to Janet for having me.
She is full of fun stuff.


I am Jayna Rae from 
RockNRegalia.


It's my little Blogland home,
and I try to make it cozy for visitors,
so please stop on by.


Okay, so today I am going to share a fun,
 little tutorial with you ladies.
It is bright, cheery, and Springy.
And ladies, 
it is still Spring for a minute or two more.


I don't know why, but this little craft project 
reminded me of the REM song
Shiny Happy People.

Most likely it is because this project involves 
a daffodil of sorts,
and daffodils make me a shiny, happy person.

This project was created from repurposed shorts pockets
(left over from this project)
a bit of yellow tulle
Twine
A Golf Pencil or crayon
And these note printables I created


This project took very little time to whip up,
and I just adore that it allows me 
to leave The Cuban Cowboy a cute note 
while I am running around like a mad woman.


So here is what you do.


First you take your left over pockets and pin them 
wrong sides together.
Top Stitch these pieces.
I used contrasting yellow thread 
and a zig zag stitch for dimension.


Now make the daffodil
(this is the most time consuming part,
 but it is still pretty quick)
First cut your tulle into a circle
and then bunch it up like a cone.
This is the daffodil center.
Set aside.


Now cut 6 petal shapes, 
as seen in the pocket photo above.
Using the petals make a flower shape and stitch.


This is the base.


Next,you are going to place the center 
that you created earlier atop the base.


Now you are going to sew this onto the base part.


This takes some eying and creativity, 
but just work with it until you see the right shape.


Next, attach the daffodil to the pocket.


You are now ready to make a handle by adding the twine.
Cut about a five inch length of twine.
Set it inside your pocket pouch.
Stitch across each end, making sure it is tightly secured.


Now the pouch is complete.


So I went to my computer and I created this simple notecards.
You can simply download them here.
This is the shape and size before I manipulated them to print 
and fit into the pocket.

I love how they carry the daffodil idea through.
I used my trimmer to cut them up and I slipped them
  inside the pouch.


I attached a crayon using a second piece of twine.
I just tied it to the existing handle.


Then I hung the pouch, note cards and all, 
on the door knob at the end of our hall 
because that's where we exit our home.


I love little projects like this because they are fast,
but have the ability to brighten up 
an otherwise bland area, like a doorknob.


Thanks again to Janet for swapping with me. 
What a fun week this has been.



5.12.2011

Guest Blogger #4: Maridith @ Strictly Homemade

Hello, I Heart My Glue Gun friends!! I am so happy to be participating in Janet's Blog Swap Party. I have not known Janet long but instantly became a follower of hers when I read her blog title. I mean, hello, who doesn't love their glue gun??? Plus, she is super sweet and super creative!!


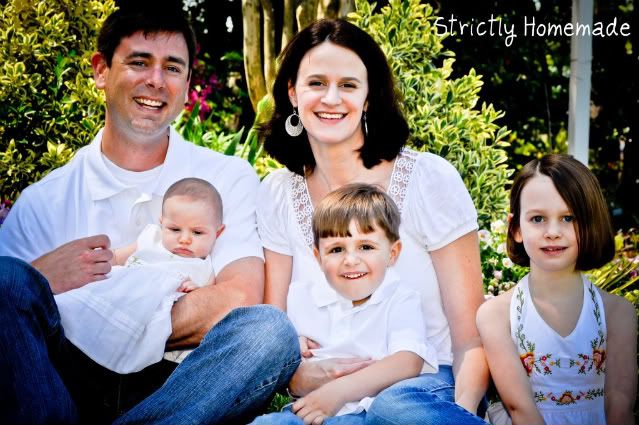
A little about me! I am Maridith, with an 'a', at Strictly Homemade . I am a wife and a mom to three beautiful children! I am a seamstress, a crafter and a wanna-a-be decorator. I make clothes for my children, gifts for family and friends and almost all of my home decor. It would be safe to say that 90% of my home decor I have either, painted, sewn or mod podged!!


Today, I am going to invade Janet's blog with one of my obsessions ...PILLOWS!! I love decorative pillows and I pretty much make them all the time. Here is a small sample of some pillows I have recently made.

Photobucket

To show my love for pillows and a glue gun (wink, wink), I am going to share with you a

No Sew Bolster Pillow Tutorial

ANYONE can make these!! I promise!!

Photobucket


Supplies Needed: Old Towel, Paper Towel Roll, 2 rubber bands, 20"X26" piece of material, ribbon, glue gun (not shown)

Photobucket
To prepare for assembly, cut material 8" wider then a paper towel roll by 26" long mine making it 20X26", use pinking scissors (not necessary but it does finish out the edges nicely without rolling them over twice.)

Photobucket

1. Fold towel to be the same width as paper towel roll and wrap towel around roll 2. Heat up Hot Glue Gun and prepare to "sew" 3. Turn over three edges and hot glue down. 4. Center towel/paper towel roll in the center of your hemmed material.

Photobucket

5. Starting with the unhemmed side and start rolling the material around the towel semi-tightly 6. Hot Glue the finished edge to the wrapped material 7. Take a rubber band and tie off one end and do the same on the other 8. Wrap ribbon around rubber band and glue down.

Photobucket


You are done!! Nothing to it!! If you have ever priced out bolster pillows you know they are expensive, with this design you can make them pennies to the dollar!!

I hope you have enjoyed my little tutorial. I would love for you to stop by my blog to see what else I have made Strictly Homemade!! Also, every Tuesdays I have a Linky Party called Strictly Homemade Tuesday where we show off all of our homemade goodies!!

Thanks so much Janet for hosting a fabulous Blog Swap!

5.11.2011

Guest Blogger #3: Layne @ Layne's Lovely Life

Hey y’all! I’m Layne, a small-town working wife and mom-to-be. I’ve been blogging for a few months now, initially as a way to document my feelings and the events during the process of buying our first home and my first pregnancy. However, I very quickly found it to be a great way to document life in general, meet awesome people living life one day at a time (just like me) and get tons of great info and advice from fellow homeowners, wifeys, and mommies! I really hope you’ll stop by my blog and follow me, I’d love for us to be friends!
                When Janet mentioned a blog swap, I was stoked. Firstly, just for the readers of my blog, she is so talented and has such fun idea, I think everyone deserves to see them! Secondly, because I love any chance to share a little bit of myself with others! Today I’m taking a page out of Janet’s book and showing you a craft project I recently did to decorate one of our guest bedrooms.  It was a little nerve racking, and tested my patience, it required me to dig deep for creative talent but it turned out amazing. I call this:

Make Art out of your Leftover Wedding Invitations!
(I can’t take credit for the original idea, I saw it in a magazine a few years ago)

Step 1:
Find at least one (preferably two) of your wedding invitations. For me, this required having my mom ship me some, because she is the hoarder and keeps everything.


Step 2:
Frames. You will need 5-9 square frames, color and style of your choice, but the more simple the better. I chose 7 12x12 black wood frames.  The key to finding the right frames at the right price is this: don’t have a design or number in your head until you start looking, you think you want 9 but you only find 7, and they’re super cheap-go for it. Be flexible. I decided to wait until a special occasion and ask for mine as a gift. What’s cheaper than free??

Step 3:
Matting. To give this a polished and professional look, you really need mats to go in the frames. Depending on the size and degree of fanciness that you are looking for this can range from cheap to more expensive than you think. I knew I wanted solid “sage” green mats, no special material. I went to my go-to for art projects, Hobby Lobby. Their art work and framing is always 50% off. Seven mats to fit in 12x12 frames and showcase 5 ½ x 5 ½ art cost me $35. Not too bad.

Step 4:
The art. The original idea said to pick certain words or phrases off of your wedding invitation that were special to you, to take them to a copier shop and zoom in 200-500%, crop and print. Easier said than done from what I found. Most copy shops don’t have this capability, and if they do by zooming in you make the image grainy. I found that there were two plausible options. 1. Kinkos said for something like $40 they would take the invitation and my instructions and send it off to be done at Kinko’s headquarters. I think this would have been great but I was on a budget so I chose option 2. I copied the text I wanted into my choice of word processor, blew it up to the size I wanted and cropped it accordingly. I used Microsoft Word, and it didn’t have a font as elegant as the one used on my invite, so I was able to download almost the exact font off the internet and use it that way. The artsy-ness of it all was that it shouldn’t be even, or centered. Some words should be cut-off, some should be off-centered, etc.


Step 5:
Paper. To give the project a finished look: print the art onto parchment paper to be framed. I went to my local office supply chain store and found that they sold fancy paper by the sheet! I have 7 frames, so I bought 14 sheets of parchment for .20 cents each. It’s always good to leave room for error, especially if you’re naturally clumsy and untalented, such as I.

Step 6:
Put it together! I practiced the printing on computer paper first. I used a ruler and very sharp succors to cut the paper. Like I said, I’m not a crafter, so I don’t own one of those fancy paper slicing machines with the grids so you know you’re cutting straight. Also, due to my lack of previous crafting I simply scotch-taped the parchment paper to the matting and put it in the frame.


Step 7:
Hang it. You want to make a design on your wall. Like I said, a lot of the “coolness” factor is the asymmetry of it all. I had 7 frames, so I did 3 rows of frames in vertical lines, 2 frames- 3 frames- 3 frames. This was the hardest part for me. Let’s just say there are some extra holes in my wall now. Because of the nature of the square frames, it is very noticeable if the lines are perfectly straight or the frames are hung crooked or off-centered. 


Step 8:
Step back and revel in your craftiness and new décor!

Layne @ Layne's Lovely Life

5.10.2011

Guest Blogger #2: Jenny @ An Apple For The Crafter


Hi all! It's Jenny from An Apple for the Crafter


I'm thrilled to be guest posting here today, because I recently had a huge victory organizing my purse and I couldn't wait to share it with the world. I do feel a little guilty, however, because no glue guns were used in this project. :)

So, about a year ago I got tired of all the stupid Member Cards and Club Cards that I had to keep on hand to get discounts. I felt like they were taking over my purse and, worst of all, that I could never actually find the one I wanted. Then I had a thought..."I wonder if these cards would fit into my Altoids container?"


I dumped out the mints and started dropping my cards in. Because of the lip on the tin they had to be finagled in but they fit. I was thoroughly pleased with myself. 

Then, a month or two ago I got a new purse and I realized I had a similar problem but with new items. I literally planned on going to the store and buying a bunch of Altoids to make new packages. I saw an idea at Running with Glitter where she decorated the tin.  I planned to use that to differentiate between the three tins. 


I got to the store and, on a whim, looked at the travel size items and I found a very small first aid kit and a travel box of Q-Tips. Oh my goodness. Yes, Please! The Q-Tip containers came in different colors too, so that made my job easier. 

I am using the First Aid kit as it was intended but with a few adjustments. Using a contact lens case, I created storage for pain medication.


I added a spare contact lens, special Band-Aids for blisters, safty pins, and a Midol...cause you know, I'm crazy sometimes!


I started storing all my stupid member savings card things in one of the Q-Tip containers. I'm storing all my gift cards in the other one.


That left me with an empty Altoids Tin. I lined it with some thin padding material. I had intended to use moleskin but Chance placed an order for some photo prints and they were packaged with a thin sheet of padding that I thought was perfect. I cut it and used double sided tape to stick it in the container. Now, my unassuming Altoids tin is the perfect storage container for...

you'll never believe it...

it's brilliant (if I do say so myself)

my iPod and ear buds!


Yeah!

Now my purse has four small containers instead of tons of random crap!


Jenny @ An Apple For The Crafter

5.09.2011

Guest Blogger #1: Natalia @ Ma Nouvelle Mode

Hello I Heart my Glue Gun Readers!  I am happy to be here today!  Let me give you a quick intro.  My name is Natalia and I blog over at Ma Nouvelle Mode (it means 'my new style' in French).  I live in France, in case you were wondering where the name came from, and finally found a craft store this year! 

 I am going to share with you a practical project I created a bit ago.  Super easy, too!  Grab those glue guns!

I started with a frame from Ikea, not the cheapest, I am sure most of you would be able to find some cheaper at a yard sale or good will or something.  We don't have those here, so Ikea it is. 

Supplies:
Frame
Something for backing (i.e. burlap, scrapbook paper, some other material)
Letters or stencils
Glue/gluegun
Razor for cutting straight lines
Cup of tea or coffee!  :)

 Start by gluing the backing of your choice to the back of the frame.  As you can see here, I chose to use a different backing for the top where 'MENU' is displayed.  I liked the feel it gave.   


Then go ahead and measure out or eye it (like I do, shhh don't tell!) and glue on MENU letters. Like I said, you could use a stencil as well, or if you have a cricut or a silhouette, those would be great too.


Et voila! I added the letters for the days, a little rope on the top for hanging, and I already had the hook. I have dry erase markers from my son's easel and there were two black markers, so one is going toward the menu board! You just erase it with a paper towel or tissue. Super easy.
please ignore the dishes in the sink... I hate doing the dishes.
 Finished project. Super easy, cute, and practical! Of course my husband still isn't too convinced I will be using it. I will have to prove him wrong!
Thank you so much for reading along with me!  I would love for you to stop by 'my place' any time!

5.07.2011

BBQ Anyone?

 Happy Father's Mother's Day!

 Oh, does it appear that I might think it's Father's Day?

 Well that's because my dear sweet Husband convinced me that in order for us to have a delightful Mother's Day tomorrow, we needed to barbecue. But, we have no barbecue. So what does that mean?


 We needed to buy one!

 That's right, we bought a barbecue so that I could have a barbecued meal on Mother's Day.

 Really though, we needed one. And it's so PRETTY!! Oh YEAH! We enjoy summer nights so it's only fitting that we grill on those nice nights that we'll be enjoying our backyard! And yes, I'm aware that my fence is a horrendous eyesore that needs to be tore down. In due time, my readers. In due time. Our backyard is definitely a work in progress :)

Don't forget about the Blog Swap Party going on this week! I have some lovely bloggers lined up to share some of their stuff with you! 


 Happy Mother's Day, all!

5.06.2011

LAST Friday's Fun Facts


1. Decorating doesn't come NATURALLY  to me. I have to be inspired, and then I branch off of that.

2. I cut this down with a reciprocating saw the other day. I was tired of it, I think it's ugly and no one wanted to come dig it out-so I got rid of it. 


3.  I never went to prom. How sad. Or is it?

4. My favorite animal is a zebra! Everytime I see them and their cute stripes at the zoo, I squeal.

5. I've always wanted to go to Israel. More so now that my Husband's dear friend is living there instead of here. He misses him, and we want to visit him.
Now if we could only come up with the thousands of dollars it would cost to fly ALL of us over there....

 There you have it, my LAST Friday's Fun Facts! I think I've officially run out of things to say about myself.


Make sure to come back here all next week for my first ever BLOG SWAP PARTY! 
So excited!

 HAPPY FRIDAY!!!!

5.05.2011

Blog Swap


Anyone want to do a Blog Swap for a day? It would be FREE advertising both ways!
 Email me and we'll talk!

janet@iheartmygluegun.com

5.03.2011

Watermelon Pink!

I'm sure you agree, when you think of watermelon, there's TONS of different things associated with it. Watermelon slices, watermelon bubble gum, watermelon jolly ranchers, watermelon lip balm, watermelon body lotion....the list goes on and on!

But today, I'm gonna show you Krylon's Watermelon in ACTION!


I've been working on the girls room for a few weeks now, but there's so much to be done that I can't keep myself motivated! I will get it done, one day. And the reward will be so sweet!

 ANYway. I've been collecting little things for the room here and there, and today I finished two little projects I've been working on.

 First up, is this little chair I picked up at a thrift store for $3. Nothing to write home about, but I saw its potential.


 After some primer and a couple coats of Krylon's Watermelon, I ended up with this!


 CAH-UTE!

 Then I took this $0.99 lamp I found in Ventura on our little getaway.........


And transformed it.....


 LOVIN' IT!

Hopefully I can get motivated to finish their room now with these little cuties to put in it! 

Linked up at-

5.02.2011

Things that make me go OOOH!!

What.a.weekend! 


The conference was incredible, John Piper is such an amazing preacher! If you ever get a chance to hear him preach, jump on it!

 We had awesome fellowship with old (but dear!) friends, which was much needed.

 But alas, it's Monday and back to normal things. So I thought I would share some things
I love and wouldn't mind having!


Love this cute little necklace!


This bathing suit is so super cute! However, I'm worried about 
the back being unflattering. So I'm still sittin' on this one!


I know, I know, EVERYONE has Tom's. But I'm getting into them! I like these ones :)


How'd this sneak in here?!

 It's slightly WAY out of my budget, but the Odyssey is my dream minivan!
So thankful to the Lord for my paid off Caravan, but Oh, how I LOVE Hondas! They're so stinkin' reliable!


And this little beaut I already OWN! Love her, but I will be painting her soon!
So keep an eye out for a bike painting tutorial!


 Hope you all are having a fantastic Monday! 

Only 4.5 more days till the weekend! 
WOOHOO!!