Showing posts with label Before and After. Show all posts

11.30.2011

Cute Baskets

Ever seen these baskets at Walmart? SOOOO ugly. But serves their purpose. To hold stuff.


Oh, and apparently to hold a long hair in the window spot. CUTE.


 Well, I couldn't stand looking at them so after a little bit of brainstorming, I was able to come up with an idea-cover them with burlap! 


After covering them up, I attached some ribbon to the top and glued a little bow on front-voila! Now I need to finish the other two, but I just LOVE how it turned out! :) 


 Don't you?

11.28.2011

From Trash To Treasure

Ok, so it's a trash can. But not just ANY trash can. I saw this trash can at the Salvation Army, and fell in love with the detail on it! Only I thought it would look 23985934857 times more amazing in a different color.


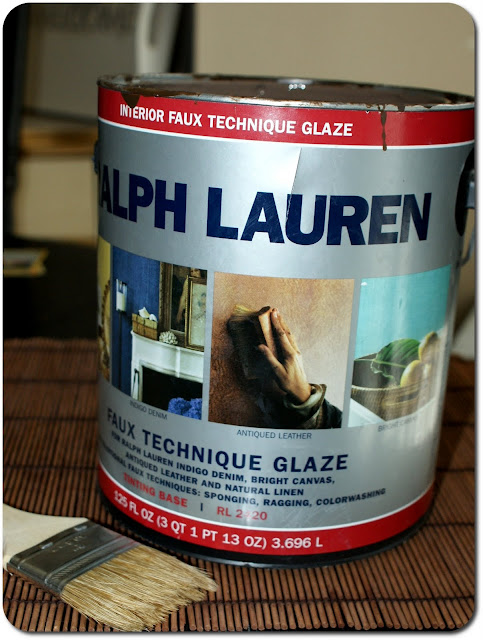
 So after a few coats of Rustoleum Aqua, and Ralph Lauren Techinque Glaze in Tobacco, I have a gorgeous trash can to go in my bedroom! 


$1.78 well spent!

10.24.2011

Little Ole Tray

So I picked up this tray a couple of months ago for $1.00 and set it off to the side. Last week I decided, I need a tray to hold the 8735634875634872560 issues of Better Homes and Gardens that I've picked up over the past year at thrift stores. So I took this ugly tray and give it a little facelift.

 Before


After!


You can't really get the intensity of the color, but it's Aqua By Rustoleum. This color is so vibrant in person! It's the same color as my thrift store lamp you can find HERE.

Off to the California Science Center today....so excited! This place is so cool. A must see if you have kiddos and can get to Southern California :)

 It also has an amazing Rose Garden, I'll make sure to snap up some shots to share!

 HAPPY MONDAY!

10.03.2011

New Headboard And Footboard

Hey friends! I'm here, and aching to get back to blogging!


 I was going through some personal stuff the whole month of September, but I think I'm getting back on track and ready to do this thing! So let's do this!

Remember me mentioning a while back that I picked up a headboard and footboard on craigslist for $65? It was originally listed for $100, but I got it for $65...score!

Here's what it looked like before, these were the pictures on craigslist-It was a light pine color:


After some serious sanding and a few coats of a custom creamy white I got mixed to match Rustoleum's Heirloom White, it's finished!


Removed the pillows so you guys could see the details of the headboard


LOVE.IT.SO.MUCH!

Our bed looks super low because I decided to use my old metal bedframe...it's a really good frame, and I didn't want to use the wood slots and support of the side rails. It took me over a month to finish this project....oops! Like I said, personal stuff. But the point is, it got finished! WOOHOO!

Missed you all, so excited that it's October....I think this is my favorite month of the year! YEAH! 

8.01.2011

15 minute Cloche!

 Hi friends! I know I've been MIA, but I'm so thankful that you all hung around and continued "following" me! I think you all are GREAT, and I love that you're here :-)

 Life has been crazy....I feel like I've been running non-stop since the second week of July! So much has happened. But alas, we're going to be starting our new homeschool year in 4 weeks; it's almost fall which is my favorite season; and it seems that everything "falls" back into place in the fall. So I'm looking forward to that! 

 Yesterday, I whipped together what I'm calling the 15 minute Cheese Dome Turned Cloche! It literally took 15 minutes, give or take with drying.

 I picked up the cheese dome at a thrift shop for 1.00, and the candle holder at the Dollar Tree. So $2.00 for this project-MY KINDA PROJECT!

UUUUUUUG-LEE!


After removing the feet underneath, Spray the plate and candle holder black in the forbidden-spray-paint-corner.


Whip out the e6000 to attach the dome plate to the candle holder base


TaDaaaaa!!! So purdy.


Can't wait to put a sweet, metallic pumpkin in here in the fall!

Tomorrow I'm going to have an AWESOME giveaway for you guys, so make sure to head on back over here!


Linked up at-
Todays Creative BlogTip Junkie handmade projects

7.01.2011

It's a chair worth sitting on!

Today is my Grandmother's funeral, and my Husband's officiating it. So it will be quite a day today. Therefore I've scheduled this post, it's the post I did over at TYPE A this last Monday.

So!

Today I want to show you a chair that I picked up at a local thrift shop for $7.00


I was totally drawn in by the floral design on top....so pretty! But, the chair could use a makeover. So that's what it got!

 First things first-disassemble the chair.


Lookin' better already.

 Now it's got a fresh coat of Rustoleum's Heirloom White....stinkin' LOVE this color!


Then I applied some ralph lauren faux technique glaze (so glad I got this stuff before they discontinued it!) 


I got it into all the little crevices and let it sit for a minute before wiping it off with a wet rag.


I then used the burlap I bought at walmart for $1.68 to cover the seat. 


I stapled the flat sides first, and then gathered the corners by pinching them, then pressing them down and stapling.


And then the chair appears to be finished!


 Only, I feel like it's missing something! So after some thought, I came up with something-a monogram of our last name's letter. So I busted out my cricut (a.k.a. My PRECIOUS) and whipped up a "G" monogram.


I cut my "G" out on contact paper that I got at the $0.99 cents store, and stuck it to the chair seat.


 After dabbing with paint and letting it dry, I CAAARRREFULLLY pulled back the stencil and voila! A beautiful "G" monogram, which I think provided the PERFECT touch to my chair!


 So there you have it! From Shabby to Chic, and PERFECT for our bathroom vanity!

Hope you all have a wonderful Fourth Of July weekend!


DIY Club
Todays Creative Blog

6.24.2011

Organize it!

These past couple of days have been hectic! Between making arrangements for my grandmother's funeral, to dog sitting, to running around doing gymnastics makeups...yeah. 

 But I finally got around to organizing the stuff under the sink! It was a disaster area....I'm NOT lying.

 Look!


(His is a little less messy than mine, but not by much!)


So let's get this thing started!

 First things first-

Pull out one of these and wipe your face....when I was going to review my shots on my camera, I had oil on my camera screen-NOT cute.

NOW. Back on topic.


Dump EVERYTHING on the floor.

  
Proceed to clean out the cobwebs that have formed under your sink because the only time you open the doors is to quickly throw an item into it.


 I got these nifty little baskets at Walmart for 1.74 each. Super cute, and does the job. See?

Looks so much better! Although there's one lingering cobweb that was being a beast, but I finally got it off after the pic.

Don't look up though....the countertop isn't looking so hot.


 But could I really end this entry with a pic like that?! No. No, I couldn't. So I won't.


Uh huh. That's right. Uh huh. I cleaned it. 

Uhm, wait. Now the mirror needs cleaning. DANGIT! Never ending.

HAPPY FRIDAY!
So thankful for the weekend!